
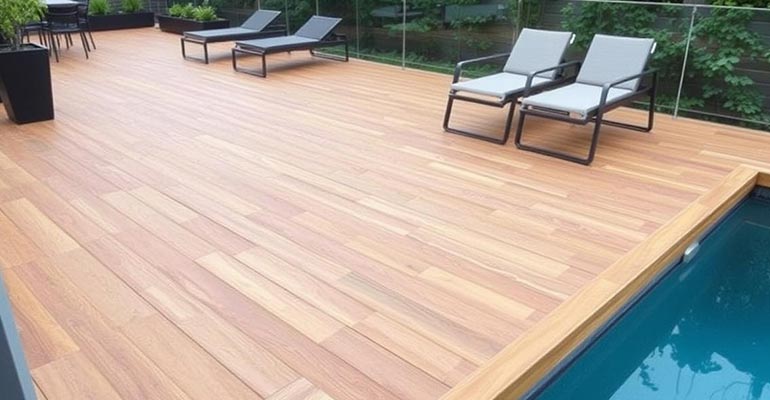
How to Build a Freestanding Deck?
A freestanding deck is a popular outdoor space solution. Unlike decks attached to a house, a freestanding deck is a self-supporting structure. It stands in an open area, offering flexibility and versatility. To build it, first prepare the site and pour a concrete foundation. Then install posts, joists, and deck beams. Assemble the frame, ensuring the structure is square and level. Finally, deck boards are laid and secured with screws.
When building conditions make it impossible to connect a deck to a house, a freestanding deck is the solution. Follow this piece to learn how to build a freestanding deck.
Table of Contents
Characteristics of Freestanding Decks
The most distinctive feature of a freestanding deck is that it is not directly connected to the house. This means it must rely entirely on its own structure to resist various external forces. If a freestanding deck is more than 2 feet off the ground, it needs to have diagonal bracing to keep it from moving side to side and front to back. In structural design, the deck’s lack of a house on one end makes it vulnerable to lifting and tipping.
Bracing made of 4×4 lumber bolted at 45-degree angles between support posts and beams helps keep the deck from moving side to side. This type of bracing is commonly used in livestock fencing. Such bracing assemblies are required on both sides of each corner of a freestanding deck.
Putting diagonal braces and anti-rocking supports under the joists is a good way to keep horizontal forces from happening. Embedded support posts help keep the deck from being lifted by strong winds. This keeps the deck from overturning. On the other hand, wood-boring insects can hurt fixed posts. So, using structural gear to connect the deck posts above ground to concrete footings is a good idea.
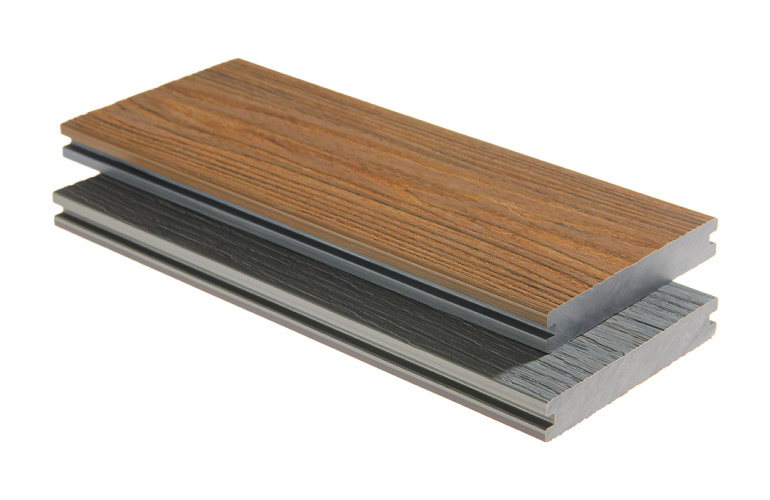
More Durable & Waterproof Composite Decking CPD-05
EVODEK unique two-tone art color technology gives you a stunning natural wood look so you can enjoy the great outdoors.
Planning and Preparation for Building a Detached Deck
Before commencing construction, thorough preparation is essential. Key steps include:
Understanding Regulations and Obtaining Permits
Familiarise yourself with local building codes before starting any work. Most detached decks require a building permit. Consult your local building department to secure the necessary permits. Unauthorised construction may result in fines or mandatory demolition.
Developing the Design Plan
A professional engineer should design freestanding decks. Improper structural design or non-compliant construction may lead to deck collapse. You will be helped by an engineer to figure out the right size for your materials, how to connect them, and how to hold them. Before consulting an engineer, clarify your specific requirements.
How do you plan to use this deck? How many people will it accommodate? What type of furniture will be placed there? The deck’s size and the way it needs to be designed to hold weight will depend on how these questions are answered. Engineers should work with this knowledge in order to make a design plan.
Site Preparation and Foundation Work
Before you build a freestanding deck, you need to clear the area and dig out the base. The specific steps are as follows:
Site Clearance and Grading
This is not merely a simple cleanup task but a critical step in laying the foundation for the entire structure.
- Clear The Site: Thoroughly remove sod, rocks, and any organic matter from the deck area. Using tools such as shovels, rakes, and wheelbarrows, ensure all materials that could affect the foundation are removed. Organic decomposition can cause foundation settlement, so complete removal is essential.
- Level The Ground: Use a rake to smooth the surface. The closer the ground is to level, the easier subsequent construction will be.
Excavating the Foundation
The foundation for a freestanding deck forms the base of the entire structure. Decks impose significant concentrated loads on the foundation. A typical deck can easily reach several tons in weight when furnished and occupied. Therefore, the foundation design must be sufficiently robust.
- Foundation Dimensions: In most cases, the foundation diameter must be no less than 2 feet. Talk to your structural expert about the thickness and diameter of the concrete foundation so that the deck doesn’t sink.
- Frost Line Depth: If you live in an area where the ground freezes in winter, the bottom of the deck foundation must extend below the frost line. If the foundation isn’t buried below the frost line, frozen ground can lift the entire deck. This creates various stresses that can damage structural connections. In short, ensure the foundation hole is deep enough before pouring concrete.
- Digging the Concrete Foundation Hole: Following the blueprint, dig a hole for the base that is the right depth and width. It’s best to excavate the bottom of the hole slightly wider than the top opening. This helps distribute the deck’s weight over more soil and also aids in preventing foundation frost heave.
- Determine The Centre Point: You need to accurately locate the centre point for the deck support posts. This centre point is where you will ultimately install the anchor bolts in wet concrete. Precise positioning is key to ensuring the subsequent structural installation is correct.
Pouring Concrete
Concrete is the core material for freestanding deck foundations. Its quality directly impacts the safety and durability of the entire structure. Place posts or post anchors into holes and pour concrete around them. Ensure they are level and installed correctly according to specifications.
After pouring, concrete requires adequate curing time. When it’s warm and dry outside, cover the concrete and water it often so it doesn’t dry out and crack too quickly. Usually, the next steps in building can’t be done for at least 24 to 48 hours. The exact duration depends on the concrete type and weather conditions.
Installing Posts
Freestanding deck posts are critical. They transfer the deck’s weight to the concrete footings. Install all posts on the concrete footings using dedicated post bases. Ensure each post is plumb in both directions. Posts should be cut to length after installation, as they will be trimmed to match the beam height.
Once the beam height is determined, calculate the position of the column tops. Use a level to ensure all column tops are perfectly horizontal. Verify measurements carefully before cutting excess material from each column. Directly burying columns in the ground is generally not recommended, as this exposes the wood to moisture and insect damage.
Building the Deck Frame
After completing the foundation, you can begin constructing the deck frame. The specific steps are as follows:
Installing Joists
Deck joists are horizontal members that support the deck boards. Their spacing and installation quality directly affect the deck’s levelness and strength. Follow the deck maker’s instructions on the size and centre-to-centre spacing of the joists exactly.
Set the joists at a right angle to the beams. The plan drawings will show you how far apart to put them. Then secure the framing to the beams using structural fasteners. Before fastening, ensure the framing is perfectly vertical.

Installing Braces
Freestanding decks require braces installed from posts to joists to prevent swaying. The installed supports must be both parallel and perpendicular to the joists. Typically, braces use 4×4 lumber installed at a 45-degree angle between posts and joists, secured with heavy-duty bolts.
In addition to braces, sway supports must be installed between joists. These are installed beneath the joists to prevent lateral movement. Collectively, these measures ensure the freestanding deck remains stable under various load conditions.
Installing Deck Boards
There are many kinds of deck boards, such as PVC, composite decking boards, tropical hardwoods, and pressure-treated lumber. Pressure-treated lumber is the most economical choice, but it requires regular maintenance. Tropical hardwoods are highly durable but expensive. Composite decking materials offer strong durability with minimal upkeep.
Choose based on your budget, maintenance preferences, and aesthetic taste. Installation typically involves these steps:
Cutting Boards
Cut the decking boards to the appropriate length to fit the perimeter of the frame. If using pressure-treated wood, ensure it has dried to the proper moisture content. When you install composite decking, you should read the manufacturer’s installation directions carefully. Because different brands may have different needs.
Using Joist Tape
Before installing any decking, apply joist tape to the top surface of the joists. This prevents water from seeping into the joists through gaps at the decking-to-joist connection. Composite decking can last 25 years or longer. However, without joist tape, cracks in wooden joists will widen over time, eventually causing the decking to become loose.
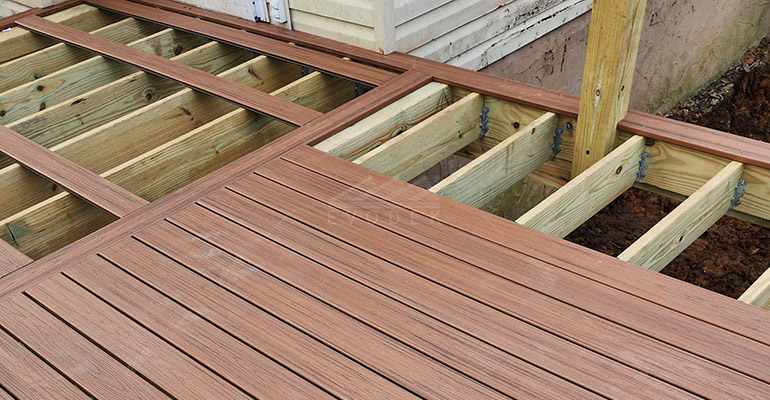
Install with Proper Gaps
Using a decking spacer tool during installation ensures consistent gaps. When using composite deck boards, follow the manufacturer’s advice on how big the gaps should be. Finally, secure the decking using specialised decking screws or a hidden fastening system.
Edge Treatment
The edges of the deck require special attention to ensure safety and aesthetics. Consider installing decking boards vertically as edge trim, or use specially designed edge trim pieces. After installation, ensure all edges are smooth with no burrs or sharp edges.
At the junction between the deck and the ground, ensure adequate clearance to prevent water accumulation. You may also install ventilation mesh or decorative skirting. These elements enhance appearance while preventing small animals from nesting beneath the deck.
Installing Additional Accessories
Freestanding decks often require complementary features like steps and railings. Refer to the following guidelines for construction.
Building Steps
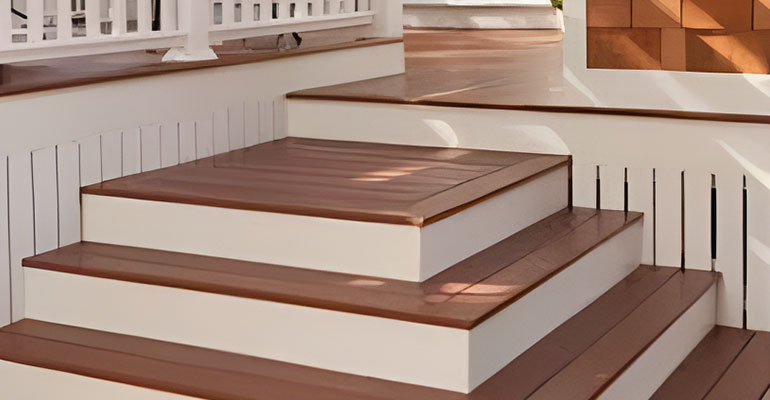
The safest and most comfy steps are the ones with a 7.5-inch riser and a 10-inch tread. To make the joists for the new deck step treads, you will need two pieces of lumber that are each 12 inches by 30 inches. If possible, connect the step ends to the concrete deck. Secure pressure-treated wood wedges to the deck with bolts to prevent the steps from lifting or sinking.
If you don’t use a solid surface, make sure the steps are supported on their own so they don’t settle. The stair width should be at least 36 inches to allow two people to pass simultaneously. All treads should slope slightly forward for drainage. Think about adding anti-slip strips to the edges to make things safer when it’s wet outside.
Installing Railing Systems
Railing posts and railings must comply with strict building code requirements. Generally, decks elevated more than 30 inches above ground level require railings. Railing height typically ranges from 36 to 42 inches, depending on local regulations.
Railing posts must be securely anchored to the deck framing, typically using bolted connections. Spacing between railing fillings must not exceed 4 inches to prevent infant head entrapment. When installing railings, ensure all connections are tight and use rust-resistant fasteners.
Final Inspection
After completing all construction, conduct a comprehensive structural inspection. Check all connection points for tightness and ensure no fasteners are missing. Test the stability of railings and steps. Verify the drainage system functions properly, preventing water accumulation on the deck surface. Also, make sure to check the connection spots, wood rot, and metal parts that are breaking down every year.
Conclusion
Building a freestanding deck is a complex yet rewarding project. If you choose good decking supplies and build it the right way, you will get a safe, long-lasting, and good-looking deck. A freestanding deck makes your home more valuable and improves your quality of life. For more information, feel free to contact us. EVODEK provides high-quality composite decking materials.

FAQ
Do I Need a Building Permit to Construct a Freestanding Deck?
This depends entirely on your local regulations. In some places, decks above a certain height off the ground need to have permits to be built. The safest approach is to consult your local building department.
Can I Use Regular Galvanised Screws to Secure The Deck?
Strongly discouraged. Standard galvanised screws lack sufficient corrosion resistance. In damp environments, they can severely rust within years, compromising structural integrity. Use screws specifically designed for decking. These features enhance corrosion protection and specialised threading. Investing in quality fasteners is crucial for your deck’s long-term safety.
How can I Prevent Weeds and Mosquitoes From Thriving Beneath My Deck?
Implement these measures:
- Lay Weed Barrier Fabric: Install permeable, weed-resistant landscape fabric beneath the deck area.
- Cover With Gravel: Spread a layer of crushed stone or pebbles over the weed barrier. This helps get rid of weeds, lets water run, stops mud from splattering, and makes the area unwelcoming for mosquitoes.
- Ensure Ventilation: Avoid completely sealing the sides of the deck. Maintaining airflow helps keep the area dry, discouraging mould growth and certain insects.
- Avoid Clutter Accumulation: Do not pile items like flower pots or wooden planks beneath the deck. These areas can trap water and become breeding grounds for mosquitoes.
Related Post


